Deploy to Power Apps
In this part, we will deploy the project to your Power Apps environment with a connection string.
Configuration
Before deploying the project, you need to link it to your environment and solution.
Environment
To link the project to your environnement, you need to modify the primno.env.json file at the root of the project.
Primno uses a dataverse connection string to connect to the environment.
If you are using an online environment, you can quickly setup your primno.env.json by using the following. Replace the Username and Url with your own values. It will use device code OAuth flow that will ask you to login in a browser.
[
    {
        "name": "dev",
        "connectionString": "AuthType=OAuth;Username=jsmith@contoso.onmicrosoft.com;Url=https://contosotest.crm.dynamics.com;TokenCacheStorePath=./cache/token.json"
    }
]
If you are using on-premises, or if you want to use a different authentication method, see connection string page for more information.
Solution
The deployment of the project is done by uploading the JS web-resource in a solution.
Create a solution in Power Apps and copy the solution unique name.
To create a solution, see Create a solution page of Microsoft documentation.
To link the solution in your project, you need to edit the primno.config.json file and change the solutionUniqueName property of the deploy section.
Example:
{
    "deploy": {
        "environment": "dev",
        "solutionUniqueName": "mysolution"
    }
}
Upload
To deploy the project, run the following command:
mn deploy
This command build and deploy the app.entry.ts entry point as JS web-resource in the solution configured in the primno.config.json file.
The web-resource is added by default with a name following this format:
{editorPrefix}_/js/{projectName}.js
Where
{editorPrefix}is the prefix of the editor in the selected solution.{projectName}is the name of the project. Heremyproject.
For example, if you choose the default editor prefix new, your web-resource will be named new_/js/myproject.js.
To change the format, see web-resource page.
Add events handlers
Now that the javascript web resource is uploaded, the Primno's events handlers need to be associated to an account form and a button command to the contact sub-grid.
Account form
The JS web resource must be added to the account form to be usable and the onload event handler must be set to initialize Primno.
The column change event handler of the name and telephone1 columns don't need to be added because Primno will add them automatically at runtime.
To find out more about the events automatically subscribed by Primno see Events page.
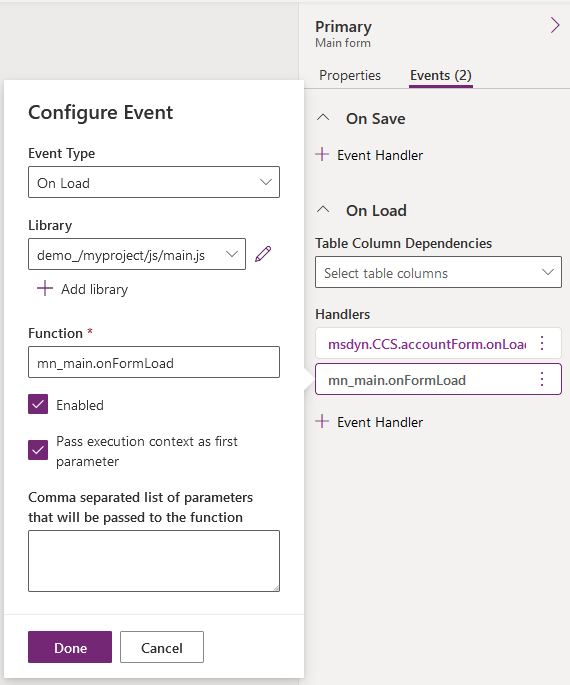
To register the onload event handler, the function name to call is mn_myproject.onFormLoad.
Ensure to check the Pass execution context as first parameter checkbox.
Below is an example of on load event handler added to an account form.

Running the command mn deploy show the function name to call.
To learn more about how to add a event handler function to an event, see Add a event handler page of Microsoft documentation.
At this point, you can open a account record and see:
| Event | Column | Message |
|---|---|---|
| Loading | - | Welcome from Primno |
| Column change | name | The value of the column name changed from {oldValue} to {newValue} |
| Column change | telephone1 | The value of the column telephone1 changed from {oldValue} to {newValue} |
Contact sub-grid button
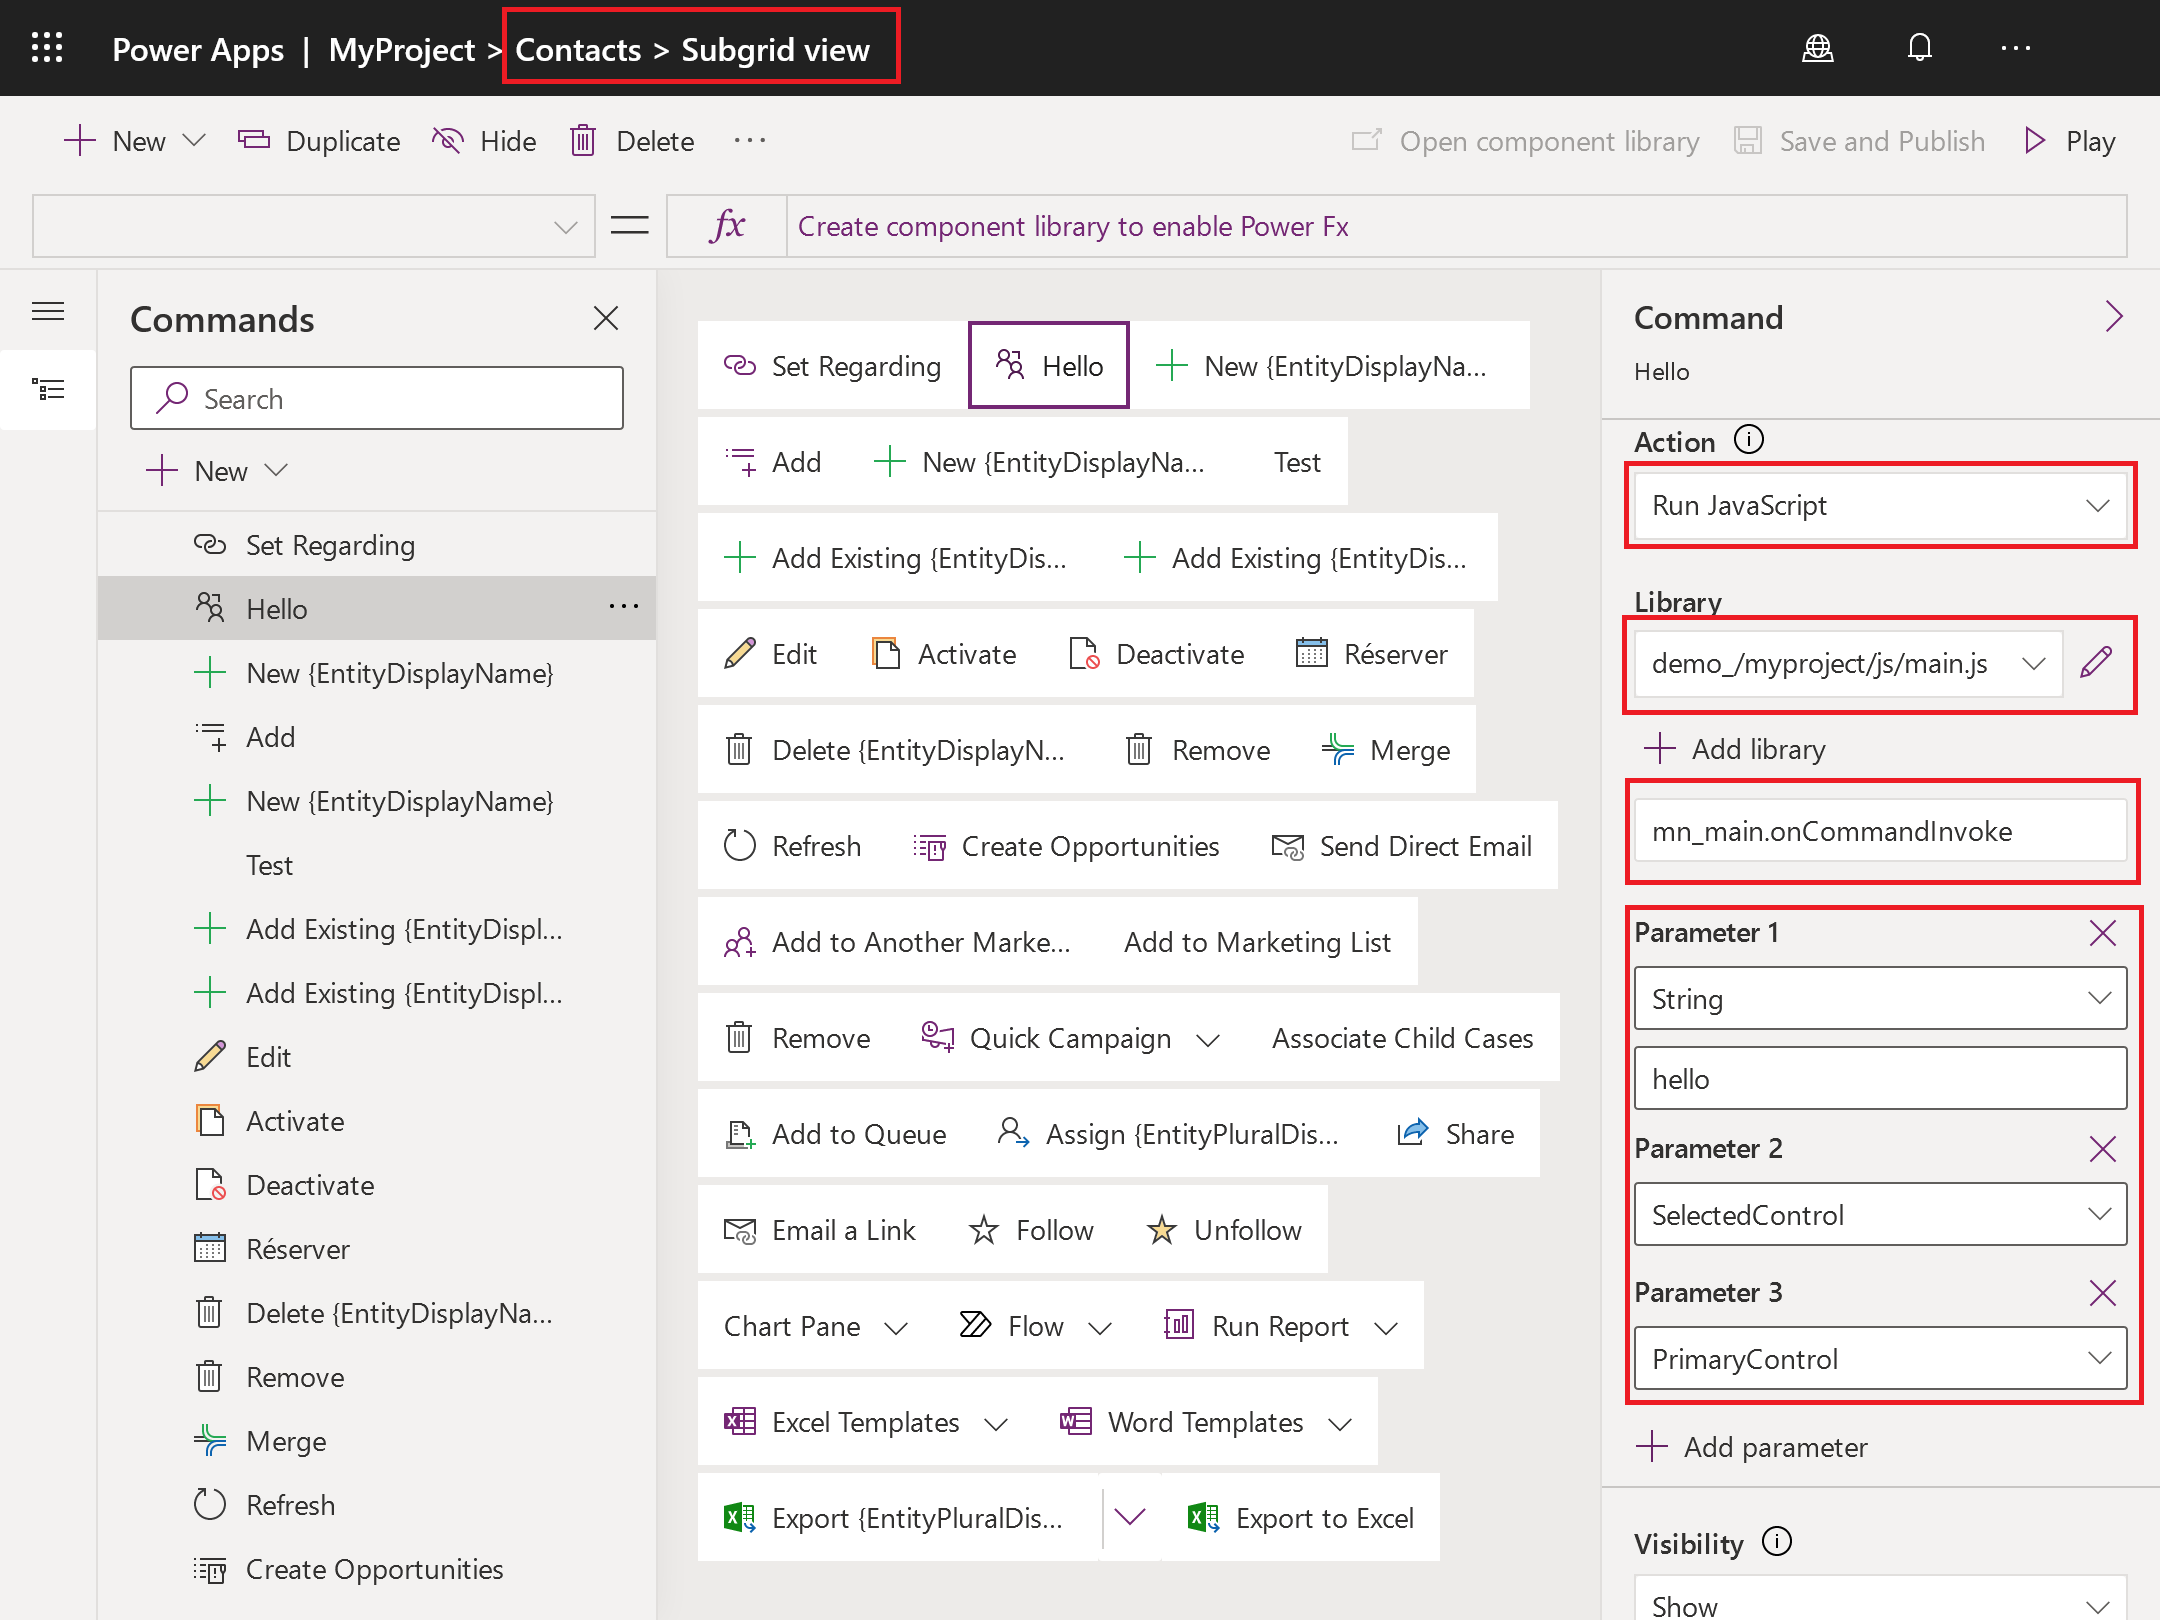
The event handler mn_myproject.onCommandInvoke must be register on a button command of the contact sub-grid.
The following parameters must be set:
| Parameter | Value |
|---|---|
| String parameter | hello |
| SelectedControl | - |
| PrimaryControl | - |
To learn about how to add a button command, see Customize commands and ribbons page of Microsoft documentation. This is can be done via Ribbon Workbench or the new Command Designer tool.
Below is an example of a button command added to the contact sub-grid with the Command Designer.

Now, when you click on the button, you should see the following message: Hello from Primno!.